Showing posts with label projects. Show all posts

Tuesday, October 29, 2013

Brennan's New Frog!

I finally got this little guy finished up!  He's been in pieces for months, but after finally buying his eyes on eBay, he is in one piece and adorable!  He's going to go in Brennan's jungle room.  I think he'll feel pretty at home there.

I figured he needed a name, so I just asked Brennan (3 years and 8 months) what his name should be.  I guess we're calling him Ear.  Yep.  Ear.  Haha!

Welcome home, Little Ear!

If you would like to make your own little crocheted tree frog, check out this link! Crocheted Tree Frog Pattern Thank you to Brigette Read of Roman Sock for the great free pattern!

Sunday, January 27, 2013

Busy, Busy, Busy! Moving and projects!

Wow.  It's been awhile!  I haven't intentionally been on a blogging hiatus, but our busy circumstances have contributed to it a lot!

So here's the deal.  I've been working on organizing and packing in preparation for our big move in the middle/end of February.  It was also moved up by 3 days, so I have just a little less time to get it all done.  Besides that, I'm beginning to plan Brennan's birthday party.  We are doing a monster theme (especially Mike Wazowski) and I'm going to be crocheting him a Mike Wazowski hat. I also think I'm going to make him a pair of these slippers as a gift.  They not only go with the theme, but he needs a pair of slippers and these are fun!!!


I have been working on a couple of product review for the blog, so watch for them to come up soon!  They both come with giveaways, that you are all going to love!

I've also had some projects keeping me busy.  Before packing up my sewing machine, I wanted to get all of my sewing projects finished.  That meant extending the legs on Bryleigh's fleece bunting (of course, she had a growth spurt right after her Grandma finished sewing it and I needed to make room for her toesies), and finishing up a tedious toy stroller cover replacement.  I didn't have a pattern, so I had to disassemble the old one to use as a pattern before putting it all back together.  That included the seat and the basket underneath... Honestly, I spent way too much time on a toy stroller, but hey- it was free at a garage sale and made a good diy project.

And though the next project wasn't necessary immediately, I always need to be in the middle of crocheting something so I have something to keep me busy on car rides and when the kids are playing nicely but still need close supervision.  I decided to make my Bryleigh a dress.  It turned out adorable and I just love it!


We're going to be awfully busy through the end of February (actually, the end of March is probably more realistic), but I hope to blog more often anyway!  Wish me luck and good time management!

Monday, May 14, 2012

Look What My Hubby Did! Our Awesome Backyard Sandbox!


We are the proud owners of this beautiful, brand new, home and hand-crafted sandbox!  We knew that our son was definitely outgrowing the little turtle sandbox and we wanted him to have an updated version!  I spent lots of time researching sandboxes, sand, and everything that goes along with them.  I finally found a blog that outlined a wonderful sandbox building plan and decided to go with that.  If you want to build this same sand box, check out these wonderful instructions: How to Build a Sandbox with Seats.

Now that the planning stage was over, it was Ryan's turn!  Together, we went and bought all of the wood and other materials (except the sand) and then Ryan got busy building.  I would have liked to help, but with a one week old baby at home, it wasn't very feasible.  After the frame was all built, 'planted' in the yard, and stained, it was time for sand!  My parents were nice enough to pick up the sand from Menards and bring it down to our place with their trailer.  We don't have a trailer and we didn't think that either of our vehicles would take very kindly to having over a ton of sand (LITERALLY) loaded into the trunk!  Anyway, after it was all said and done, here's how it turned out!

We love our new sandbox, especially Mr. Brennan!  Thanks, Daddy!

Friday, January 27, 2012

Look what I did! How to cover a composition book in fabric...

Here is my newest little project that I completed a few hours ago!

During my pregnancy, I've been keeping a journal to document how things have been going.  I think that my daughter will enjoy reading it someday.  With Brennan, I bought a pregnancy book to fill out, but only filled in about half of it.  Some of the questions were just so hard to answer!  This way, I can just write an entry every couple of days and I'll have most of the details recorded. 

When deciding on a book to journal in, I had a few criteria to consider.
  1. I wanted it to be cheap.  Really cheap.
  2. I wanted it to have a cover that was pretty gender specific, instead of gender neutral like everything I bought during my first pregnancy.  This time we were finding out the sex of our baby, so I wanted to be able to use that information for a few different things.
  3. I wanted it to be big enough so that I wouldn't run out of pages, without being excessively huge so that most of the pages would go unused.
I had one big problem... I wanted to start this journal as soon as I found out I was pregnant, to record the entire pregnancy, but I wouldn't know the sex of my baby until approximate 16-18 weeks.  I didn't want to have to re-copy all of the entries from one book to another-that would take up too much time and be mind numbing!  So I thought about it a little bit and came up with an awesome solution: get one of those cheap black and white composition books and cover it with fabric once we know the gender!

I hoped I wouldn't run into problems with the material bunching or wrinkling.  That was my main concern.  Lucky for me, my plan worked like a charm.  This was so easy and I think it turned out so cute!  I may not even be finished with it.  I can kind of envision a coordinating ribbon  run around the cover about 1/3 of the way down.  Maybe it'll even need a little birdie applique over the ribbon, or some sort of title...  After all, I need the outside to be EXTRA cute to make up for my not-so-cute penmanship on the inside (honestly- I write like an 8 year old boy...)!

Here's how I did it:
  1. Gather a composition book, your choice of fabric that will be large enough to overlap the edges of the book by about 1/2", a scissors, and some adhesive spray.  Check to see if the pattern of the composition book shows through your fabric.  If it does, you'll want a white sheet of paper or a piece of white material to first cover the book in.
  2. If you are using a white 'base layer', you'll need to do this step.  Lay out a lot of newspaper to protect your workspace from the adhesive spray.  Lay your white layer on the newspaper and spray it with a coat of adhesive spray.  Place your book onto the paper.  Press and smooth the paper out on the front and back covers.  Next, take your scissors and trim the paper along the edges of the notebook.  You don't need to leave any extra- just trim it flush with the edge of the book.
  3. Next, lay out more fresh newspaper and lay down your piece of fabric.  Spray it with a coat of adhesive spray.  Place your book onto the fabric.  Press and smooth the fabric out on the front and back covers.
  4. Using your scissors, carefully trim out a small section of the overlapping fabric at the top and bottom of the binding to allow the fabric to be folded into the front and back covers.
  5. Now, open the book and press both corners of your fabric on the front cover in at 45 degree angles.  Press the rest of the overhanging fabric down carefully after the corners are pressed in.  Repeat with the back cover.
  6. You can either choose to be finished at this point (I did) or you can cut a rectangular piece of paper or fabric (if you use fabric, you'll need to turn the edges under with adhesive spray, double sided tape, or a sewing machine) and place it on the inside of the front and back covers to cover the raw edges and give it a more professional look.
I love how my book turned out, at least so far, and if anyone else does this, I'd love to see some pictures!  Just comment with a link or send them to colleen_m_anderson@yahoo.com!

Friday, December 30, 2011

New Year, New Projects...

Well, Christmas is over with and the New Year is almost here.  I'm a little sad to be done with the holidays already.  It seems that the season just went way too fast this year.  However, with my cross stitched Christmas stocking and all crocheted gifts done, it seems that I'll hopefully be having a little more free time to begin a few more crafts!  Here's what I did this year (keep in mind that these pictures only include my cross stitch and crocheted Christmas gifts, not any other gifts or projects I made throughout the year): 


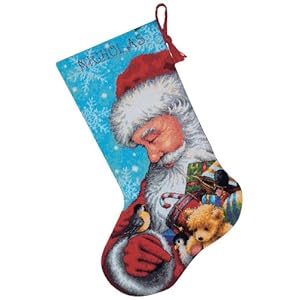
The hugest new project of 2012 will definitely be our newest baby's Christmas stocking.  I've already picked out a design kit and just need to get it purchased and start working on it like crazy.  This is a picture of the kit I'm planning on doing.  My goal, like this year's goal, is to be done with it by Thanksgiving, or at least December 1st.  That leaves all of December free for me to complete other projects, including shopping and gift wrapping, before Christmas.  I'm excited to get started on this project, but know the countless hours of work that I'll be putting into it, as well.  It makes me wish I could work a lot faster, that's for sure!  Fast projects are so much more instantly gratifying, which is why I'm really excited to start crocheting some newborn hats and other stuff!

I'm looking for ideas and suggestions about what cute newborn items my new baby girl needs!  I've seen some of the cutest patterns for crocheted animal hats and matching diaper covers including chicks, owls, giraffes, hippos, elephants, bunnies, etc... Basically any cute, cuddly, or otherwise fun animal.  I'm having the hardest time choosing between them because I know I can't do them all!  I'm definitely making  one of the long-tailed elf hats for newborn photos (*correction... I MADE this already before publishing this post!), just like the one found here at Oodles 4 Noodles.  Isn't this the cutest thing!  I'm also working on a matching diaper cover.  What else do you think I should make?

I'm also tossing around the idea of adding a mini-store to my blog where I would sell some of the stuff I crochet. Of course, this is so dependent upon how much free time I'll have in the coming months, but I'd love to be able to share some adorable hats with other people who love this stuff... and make a little money on the side :)!  Hopefully, I'll have some free time to get to it soon.  Before that I still need to catch up with the pregnancy journal that I've been writing for the baby and finish Brennan's baby book before I need to start another!  Obviously, I'm not a scrapbooker, or I'd enjoy these projects more.  I'd rather be crocheting, knitting, or cross stitching, but finishing the books will mean a lot to my kids someday, so I'll just have to get them done!

I'll post more pictures as I finish up projects.  I'm always so excited to show them off :)!

Oh!  By the way, I'll be posting another review and giveaway very soon!  This one is sponsored by a fantastic Etsy shop that makes handmade jewelry.  You're really gonna love it- especially all of you Moms out there!  Keep your eyes open for it and make sure to enter!  You won't wanna miss this one!