Tuesday, March 27, 2012

Yum... Dog Food!

This is a good one.  Since my blog is supposed to be about a day in my life, I think this issue I face needs including!

I think that almost every kid has tried dog food at least once.  Most of the time it goes in the mouth and comes right back out.  Well... that's not really the case with my Brennan. 

The boy loves dog food.  I find it totally disgusting- the fact that he likes it, I mean.  I haven't tried my dog's food myself.  If I don't want him to eat it, I have to keep the bowl locked in the kitchen or back porch.

And it isn't like he gingerly nibbles one piece at a time.  No.  It's an entire handful!  He jams it right in and then scampers away to avoid me trying to make him spit it out. 

In fact, the other day I was trying my best to get him to spit some out.  We were outside on the deck and I was holding him so he couldn't run away.  I kept telling him, "Brennan!  Spit it out!  That's disgusting!  Spit it out, now!"  He looked me right in the eyes and shouts, "EAT IT!" as he crunches down the last bit.

So today I decided to try a new experiment- pretend that I really don't care that he's eating dog food and completely ignore it.  Maybe it's an attention stunt?  Turns out it isn't....  He took a handful, shoved it in, and then crawled out of the house through the dog door to enjoy his delicacy on the deck.  I was keeping an eye on him to make sure he wouldn't choke or anything.  Pretty soon I see his little hand poke back in through the dog door and right into Emmy's bowl for another bite.  And then again... So apparently my 'ignore it' plan wasn't working. 

He also enjoys dog treats.  He asks to give one to the puppy, but at least half of the time he's the one who ends up eating it.

This all probably makes me sound like a stellar mom, but besides only putting the food bowl on the floor when Emmy is eating, I don't know what to do!  I guess I feel that I have many more important battles that I need to fight with him than the dog food war, so I don't make too big of a deal out of it.  It isn't going to hurt him.  The main problem is that it disgusts me.  I assume that he will outgrow this phase.  If not, I've got bigger problems!  Today, I started telling him that there are chicken beaks and feathers in dog food.  He just happily repeats, "beaks and feathers!"  I think I just inadvertently made dog food even cooler...

So, any suggestions?  Or more importantly- does anyone else's kid do this?!?  Gross!

Sunday, March 25, 2012

Happy Monkey Vinyl Design Review + Review of Etsy shop Wall Vinyl Designs!

As Brennan's 2nd birthday came and went, it dawned on me that I really needed to start keeping track of his height on a wall, just like my Mom did with my sister and I as we were growing up.  It is so fun to look at the door frame where she marked our height each year and see when we had growth spurts or hardly grew at all!  

So, I started to think about where in my house I wanted to mark down Brennan's height.  I had one big problem, though- we don't plan to stay in our house forever and it would be so hard to leave a memory like this one behind!  I realized that I needed something that can move with us when we decide to switch homes.

Since Etsy is an awesome place to find unique items from wonderful, helpful sellers, it was the first place I turned to.  I started browsing and immediately fell in love with a vinyl growth chart from Wall Vinyl Designs.  It is the cutest monkey design and I knew it would be perfect for my little monkey!  I asked the shop owner, Lewis, if he would be interested in having me do a product review of this growth chart, and to my delight, he was!  I was even more thrilled when he asked me to review an entire package of "Happy Monkeys" vinyl designs!

First, let me tell you a little bit about Wall Vinyl Designs.  This shop is located in Ontario, Canada.  Lewis has been in the design business for over 15 years and had his Etsy shop for just over a year.  In that time he has had 163 sales and kept his feedback at 100% positive- a great track record!  Wall Vinyl Designs carries many different styles of vinyl decals and what isn't carried can be created upon request for your very own custom order.  If you can think it up, Lewis can bring it to life!  He has such a passion for design that he also opened up a free font website where you can download a huge variety of different fonts.  You can check it out here: http://vinylcutterfonts.com/.  The funny thing is that I've used this site in the past, before ever even working with Wall Vinyl Designs!

I want to show you just a few examples of the types of designs that are available at Wall Vinyl Designs.  First off, here are a couple of examples of what I went to Etsy to look for in the first place- growth charts.  There are many different designs available and they can all be customized with colors or names to fit in with the design of a room.


There are a lot of designs that are aimed at nurseries or children's rooms, but also a lot that would look great anywhere in the house.

This one would be perfect for a little boy's room!

And this one for a little girly girl's room!

This is great for a child's room, but also for a teen or an adult's room.

Here are a few designs that would work great anywhere in the house.

I just LOVE these dandelions!

I can see this on the living room wall surrounded by family photos.

And with all the hunters here in Minnesota, I could see this one being popular...

Here's the last example I want to show you.  I can imagine this on the wall of a bachelor pad or the door of a dorm room!  It'll definitely elicit a response from visitors!

This one will shock a few people...

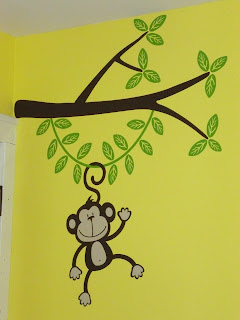
There are a lot more designs available for sale at Wall Vinyl Designs that you can hop over and look at, too!  One of their most popular designs is the "Happy Monkey" line, which I was asked to review.  The review package that I received included a tree with 4 fun monkeys hanging out, a separate branch with its own happy monkey, a monkey growth chart, and a personalized monkey name design.  Before the package was sent to me, I had to make some big decisions about how exactly I wanted it to look.  

Any design can be customized by flipping it, changing colors, resizing, etc.  Since this would be going into to our very colorfully focused nursery, at first I was leaning toward having the monkeys match and coordinate with the existing green, blue, and purple colors.  I think it would have been really cute, but going with all 3 colors may have looked a little wild and trying to agree on one of those colors between Ryan and I wasn't going very well.  In the end we opted to keep the colors just as they were in the Etsy listing pictures- brown and tan monkeys, which are so cute as is.  

We thought the entire design might look a little large on our wall, and when I expressed this concern to Lewis, he immediately let me know that he could resize it to any size that we wanted, but also offered to create a digital image of what the design would look like on our wall.  Needless to say, I was impressed!  I emailed a picture of our wall along with the dimensions and he digitally 'applied' the design for us.  It looked wonderful at original size.  This first picture is the one I sent, and the second shows a preview of what the images would look like.  Pretty cool for a mock up!  By the way, I hadn't told Lewis what name we wanted on our name design, so he used his grandson, Keegan's, name as an example.


As a quick side note: Saying that I've been impressed by Lewis is an understatement.  He has the best communication and has been the most helpful Etsy seller I've ever worked with (and I've worked with some other pretty amazing Etsy sellers)!  He answered all of our questions thoroughly and very quickly, which is something that I appreciate so much!

As soon as the package came, I was very anxious to get working on applying it.  The design comes in a lot of pieces, which need to be carefully applied next to each other to create the final look.  For example, the brown 'woody' part of the tree consisted of 8 separate pieces.  All of the monkeys and leaves are also applied individually.  So, before we even got started, we had learned something: the time involved in applying a vinyl design was going to be a bit longer than originally anticipated.  Maybe I was naive, but my impression of vinyl designs was that you would basically peel it off, slap it on the wall, and you were done, which isn't exactly the case!  In order to have the design come out precise and beautiful, we knew that we needed to take our time and do it right!

Here is the general process, shortened and paraphrased, that the instructions outline along with some demonstration photos.  (A special thanks goes out to my beautiful model, the hubby...)

1. Clean your wall well with Windex.


2. Quickly rub the design's application tape with a firm, flat object such as a squeegee, popsicle stick, or credit card to ensure that the vinyl sticks to the tape.

3.  Tape one edge of the design to the wall, making sure it is lined up correctly.


4.  Carefully flip back the design and begin to slowly and carefully remove the backing paper while gently applying the application tape to the wall.


5.  When you are confident of the position of the design, carefully rub over it with your hand to ensure adhesion.  Then using your flat object (credit card or popsicle stick), rub the design firmly (rub hard!) to allow each part of the design to stick to the wall.


6.  Carefully remove the application tape from the design making sure that it is sticking to the wall.  If parts are coming up, give them another firm rub before continuing.


7.  Lastly, trace the design firmly with your finger, giving it even more adhesion strength.

It sounds super easy, and for the most part, it is.  We did learn, however, that it takes a little practice and patience to get it just right.  It isn't quite as easy as I thought it would be, but the results are awesome!  Our biggest issue was that we were having trouble getting the vinyl design to adhere to the wall while we were pulling away the application tape.  Even after re-cleaning the wall and rubbing REALLY HARD on the application tape, we were still having some issues.  Finally, we realized that instead of pulling the tape off of the design at a 90 degree angle, we should pull it off at the sharpest angle possible to put less stress and pressure on the design.  That helped immensely.

We applied Brennan's name design to the front of his toy box and the growth chart to a board on the back of his door.  Both of those applications went smoothly, as well, and look wonderful. 

Overall, I think the installation went really well.  Would I do it again?  Absolutely!  It took a little time to perfect our skills, but I think it is something that the average person could definitely do as long as they take their time and follow directions.  

I am by no means a vinyl expert, but this vinyl seems to be very high quality.  It seems durable and the colors are vibrant.  The design was sharp and precise and is unbelievably cute.  And most importantly, the tiny critic who lives in the room LOVES his new monkeys!  I've heard more "oooh ooooh ahhh ahhh" lately than I can tell you!  He is definitely a huge fan.

Here is our finished nursery along with a few extra pictures showing the work along the way.

It's all done!  We LOVE how it turned out!

A close up of our happy monkey tree.

Here's the branch coming out from the door frame.
 
Our little monkey with all of his monkeys!

Here I am applying the last monkey to the tree.  I have a helper, too...

Make that 2 helpers!

Thursday, March 22, 2012

Quick Pregnancy Update

For those of you that don't already know, I'm still pregnant...

I know I really shouldn't be surprised since I'm not due until March 29th, but I didn't think I would really go this long!  Brennan was already born by this time in my pregnancy with him and I'm out of room!  I'm a really short person, only 5 feet tall, and my torso doesn't accommodate full grown babies very well.... or maybe it does, I guess!

The doctor is guessing that this baby will be between 6.5 and 7 pounds, which is just a little bigger than Brennan was.  He weighed in at a whopping 6 pounds 2 ounces... :)

I've been mostly comfortable, at least much more so than I was with Brennan at the end, but this last week has really gone down hill.  There is no question that she is running out of space!  I've been having a lot of contractions, but nothing that keeps going.  Every time I start to think they are the 'real thing', they taper off again.  Oh well.  Patience is a virtue that I need to keep working on!

I'd like to meet this baby now, but she doesn't seem extremely anxious to come out!  I've tried pushing on pressure points to no avail so far.  But one of these days she'll make her appearance!

We're excited and nervous all at the same time, but I can't wait to hold my new one!  Here's hoping Brennan adjusts well and is the best big brother ever!  Oops!  Gotta go!  My water just broke!!!.........  Just kidding.  Hey- if she goes overdue she could be an April Fool's baby!  We better just get used to this!


Monday, March 19, 2012

My version of 'Wonder Bumpers'- A mini tutorial

A couple of weeks ago, I mentioned in my to-do list post that I was working on making a new type of crib bumper for our baby's crib.  Well, last week I finished them up and I think they turned out awesome!  They are very different than the average crib bumper, looking more like nursery decor than bedding, and they are safer, too!  First, let me show you a picture of my finished product!


These were not hard at all to make.  If anything, they were time consuming.  But I tend to be a perfectionist and make everything a bit more involved than it really has to be. 

Here is a list of general supplies that you'll need:
  • Foam pipe insulation
  • Serrated knife
  • Fabric to cover your foam
  • Adhesive spray
  • Ribbon Ties
  • Snaps(optional)
  • Snap Pliers (optional)

I wish I could give you a more specific list of supplies including measurements and such, but everyone's needs will be a little bit different based on the crib you are making these bumpers for and your own personal preferences.

To start, you'll need to figure out how much foam pipe insulation you'll need.  First, decide how tall you want your bumpers to be.  Some people like them to cover the entire rung.  I preferred that mine be only about the height of normal crib bumpers so that my baby will be able to see out into her nursery more easily. Plus, it also saves quite a bit of cost to make them that much shorter.  I chose a height of 9" for mine.  Decide on a height and multiply that number by the number of rungs your crib has.  That is the total number of inches of insulation you'll need.  I believe that the insulation I bought came in 48" lengths, which meant that I could get 5 bumpers out of each piece with 3" left over as scrap material.  Make sure you account for your scraps, too.  You'll also need to measure the width of your crib rungs to make sure that you get insulation with a big enough center hole.

Next, get out your tape measure and measure out the length of each bumper, marking each as you go.  Using your serrated knife, carefully cut/saw through the insulation, trying to cut as squarely as possible.  It isn't hard to cut at all, you just want to try to keep it straight and most importantly, not cut yourself.  After you've got all of your bumpers cut, you are ready to move on to your next step.


Now, we're going to be cutting pieces of fabric to cover the bumpers with.  Just like with the insulation, you need to make sure you account for scraps.  I chose to use fleece because it is soft to the touch, pretty cheap, thick enough that it wouldn't show the dark insulation through it, and comes in a huge variety of colors to match most any room.  You'll want to cut your fabric into rectangles large enough to completely cover your bumpers, including enough to tuck into the opening.  It was a little tricky to get the fabric just the right size so that it was easy to work with, but I was able to.  I think an overlap of about an inch on each edge is about right.  You can see, my rectangles varied a bit in size, but it isn't too big of a deal. 


Once your fabric is cut, your ready to use your spray adhesive and cover the bumpers.  First, lightly spray your rectangle, allow to stand for a few seconds, then place your foam right in the very center, seam side facing up.


Carefully wrap the fabric around one side of the foam and into the seam, then roll the foam towards the rest of the fabric, also tucking that end into the seam.


You can see here that each long edge of fabric is tucked into the seam.  Now you have to tuck each end down into the bumper.  This is probably the trickiest part, but you'll get the hang of it!  It doesn't have to lay perfectly on the inside since it will be tied or fastened fairly tightly to your crib rungs.


After covering your bumpers, they are basically done!  All you need to decide now is how you would like to fasten them to your crib rungs.  I chose to make ribbon ties with snaps so that my curious/semi-destructive toddler would have a harder time taking them off of his sister's crib.  I thought that if I tied them all on the sight of all the bows would draw his attention even more!  Adding the snaps did add extra cost, but not a ton, especially since I didn't need as much ribbon as if I'd been tying bows on each end.  Plus, I already owned a snap pliers from the cloth diaper making adventure I'm on.

Here's my totally finished crib!


I used another tutorial as a guide to help me create my bumpers.  If you'd like to check that one out, here it is:  Wonder Bumper How-To

Wednesday, March 14, 2012

Birthday Fun!

Today is my 26th birthday and I've had a really awesome day.  It was low-key, but nice.  The weather here was AMAZING today and I really loved getting out in the sunshine.  I can't say that 76 degrees in March is very normal for Minnesota.  I brought up to my family today that 10 years ago, my surprise birthday party was cancelled on account of an ice storm and today I was wearing short sleeves and capri pants!

My day started with a baby check appointment (surprise, surprise...).  I'm 38 weeks today and once again, she and I are doing wonderfully.  She had a great heart rate of 150 beats per minute, has finally turned completely towards my back, and she's measuring in at just the right size.  I have low/good blood pressure, no swelling, very stable weight, and have no protein or glucose in my urine.  Everything really is going perfectly so far.  Hopefully labor follows suit this time!  As of last week, my doctor thought that I might have a baby by Saturday the 17th or Sunday the 18th.  Now, unfortunately, she thinks it may be another week.  It's not too big of a deal, but we're anxious to meet our little lady and I'm really beginning to get uncomfortable.  Time for a baby eviction!  My plan- start trying to use acupressure points to encourage labor, starting on Friday.  I STILL want a St. Patty's day baby!  We'll see.  Hopefully it speeds our little one along.

After my appointment, I came home and did a few odds and ends before heading out to my Mom and Dad's house.  My Mom had already taken Brennan to their place, after watching him during my appointment and taking him and the dog for a walk.  We left for lunch at a nearby out-in-the-country bar and grill where we had some delicious chicken strips and french fries while savoring a Sprecher's root beer.  Yum!  My Mom, Dad, Brennan, Niece- Autumn, Nephew- Wiley, Grandma, and Grandpa were all there and it was a nice time.

We headed back to Mom and Dad's shortly after lunch.  Dad helped me install (or should I say that I basically watched while he worked) the back up camera that Ryan had given me for Christmas onto my vehicle.  That will sure be nice to have working!  After we finished, Brennan got to go on his very first motorcycle ride with Grandpa and Wiley!  He looked pretty adorable on Grandpa's yellow Harley. 

Mom baked cupcakes for my birthday and she, Autumn, and Wiley decorated them.  They were pretty festive and very tasty!  Brennan was quite unhappy about leaving Grandma and Grandpa's, as always, but we had to get back home in order to get to our our chiropractic appointments in time.

I asked our chiropractor about pressure points for inducing labor and now have some good information about it.  I'm thinking I'll try it on Friday... maybe I'll get lucky and it'll work to produce a St. Patrick's baby for me... and no- her name won't be Patty!

We headed home afterwards and shortly later, a little bouquet of flowers that Ryan ordered for me showed up.  What a sweet guy.  We took the evening easy, just having a frozen pizza and watching Survivor.

That's what I call a good day.  

Monday, March 12, 2012

Maternity Pictures- Round 2!

Hi everyone,

I just wanted to share some of the second round of maternity pictures we had taken with you!  Between the two sessions we definitely got some awesome ones.  Can't wait to meet this baby soon!  I'm due in 17 days, but the doctor said her guess is that I will go into labor this weekend on the 17th or 18th!  But I suppose her guess is as good as anyone's.  It seems so soon- crazy!  Wish us luck!